Settings, team, and notifications
Configure the workspace, classification, rates, defaults, and access.
Open Settings in the sidebar, then choose its subsection. Settings changes require the corresponding workspace or team permission. View-only settings show a notice and disabled controls. Import/export permissions are handled separately.
Capture credits and history
The sidebar shows your available Capture credits. Choose that balance to open Settings → Billing. The balance updates as document capture uses or returns credits.
Credit history lists the date, document, credits and Charged or Returned status. Saved documents link to their review page. Discarded uploads and deleted drafts keep a plain-text name in history. Older entries whose original document name is unavailable say Unavailable document. Use Previous/Next for older activity.
A new supported capture uses one credit for up to 20 pages. Failed or unsupported captures return the reservation; cache reuse and automatic retries do not add a charge. A completed capture remains charged if its upload is later discarded.
Automated data capture
The Automated data capture setting appears only when an operator has enabled Document capture for the workspace in the admin panel. Without access, capture actions are hidden and uploads remain manual.
Open Settings → Defaults to manage Automated data capture for the workspace. It is off by default. While off, uploading/attaching a file does not start OCR/AI or use capture credits; choose Capture document and confirm to start it yourself.
Enabling the option and choosing Save defaults opens a disclaimer about document processing with OCR/Amazon Bedrock, one credit per supported capture (including unsaved uploads), returned credits for failed/unsupported runs, and reviewing suggestions. Choose Enable and save to accept; Cancel leaves automation off. Only a user who can manage workspace settings can enable it. It applies to future uploads and attachments, without reprocessing existing files or automatically saving/confirming documents. Uncheck it and save to return to manual capture.
Workspace profile
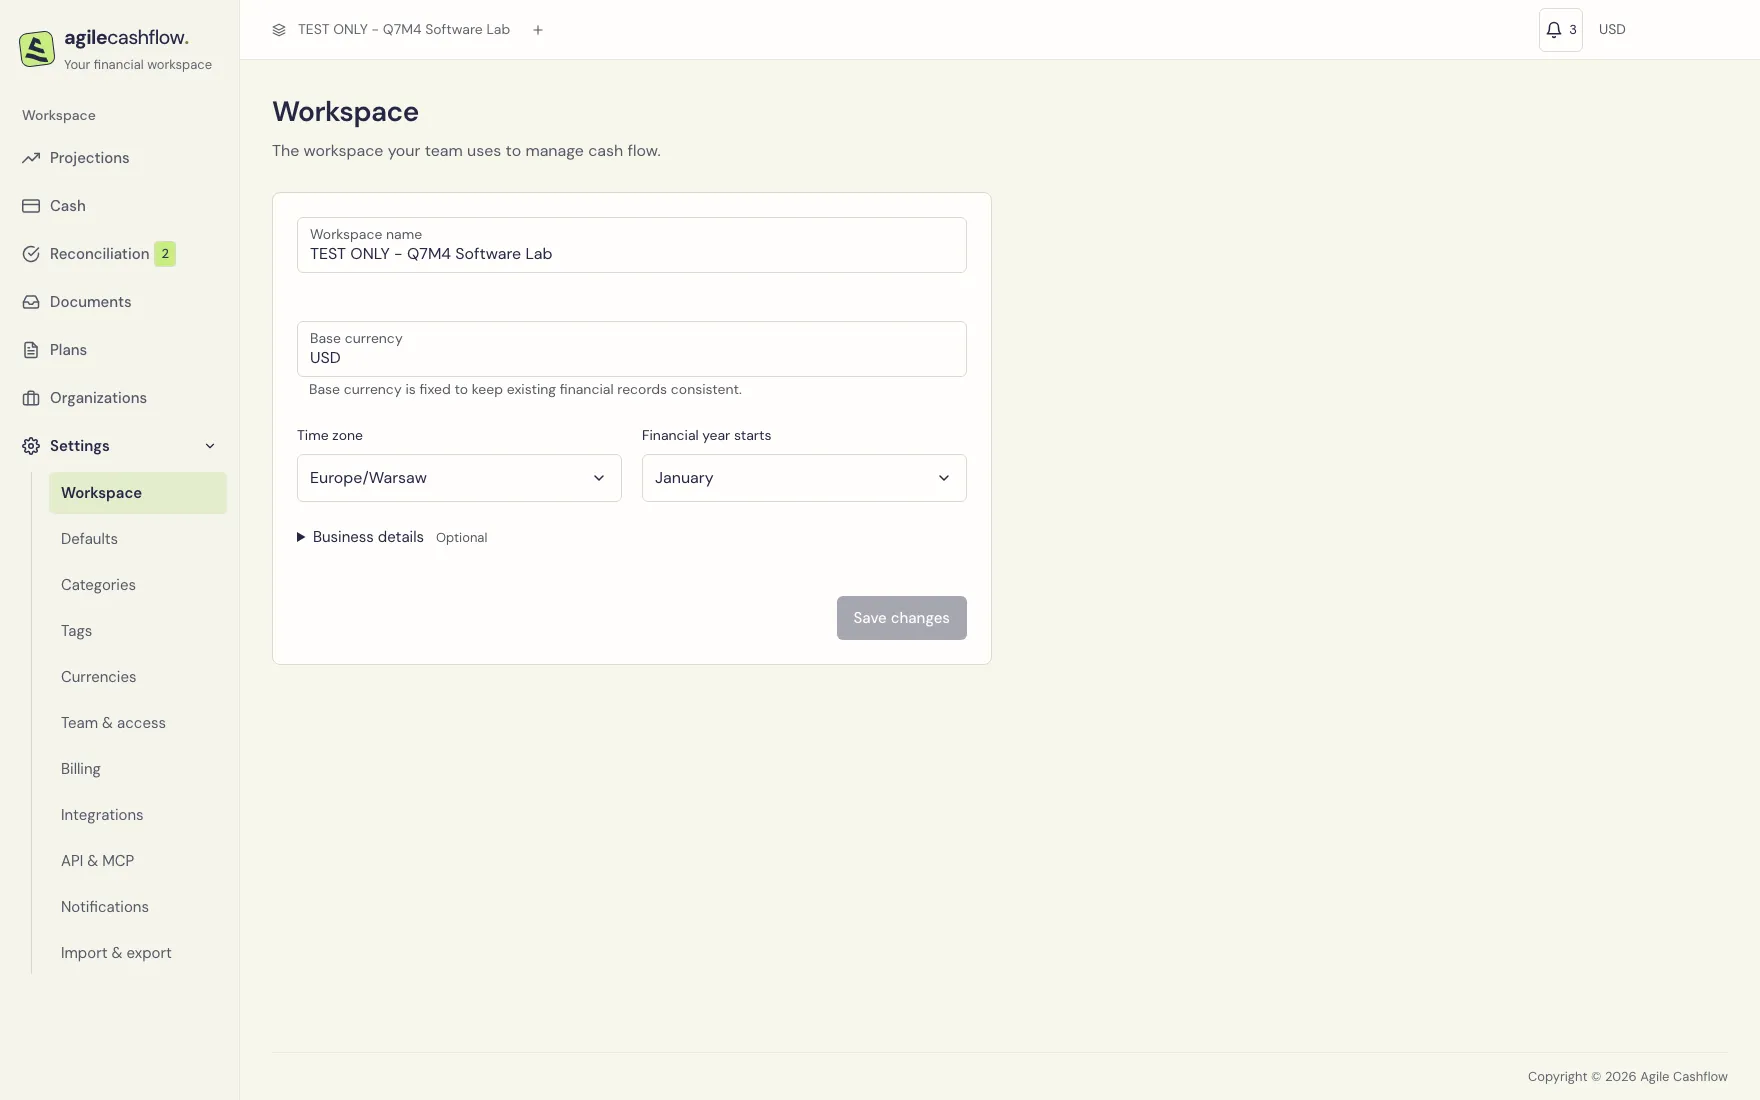
- Open Settings → Workspace.
- Edit Workspace name, Time zone, and Financial year starts.
- Expand Business details to edit Legal name, Tax / VAT ID, Business email, Business phone, and Business address.
- Choose Save changes. Check Workspace saved and the updated top-bar name.
The Base currency is read-only. It stays fixed to preserve the meaning of existing records. The example uses USD, Europe/Warsaw, and January. Reminder dates follow the workspace time zone; timestamp formatting elsewhere can follow your browser.
If a teammate changed the workspace while your form was open, the app rejects a stale save. Preserve the edits you need, choose Reload workspace, review the latest values, and save again. A financial-year setting is a workspace preference; the platform does not calculate tax returns from it.
Categories and tags
Categories classify income and expense, such as Development revenue, Payroll, Contractors, Cloud hosting, or Equipment. Tags provide additional labels, such as C01 portal, Recurring, or Operations. Use them for consistent classification rather than creating slightly different spellings for the same concept.
- Open Settings → Categories or Settings → Tags.
- Choose New category or New tag, enter a name, then create it.
- Use Search to find an existing label. Linked records reports its usage.
- Use Rename → Save name to change a label while preserving its links.
- Use Archive, read the confirmation, and confirm to hide it from new selections. Existing records retain their links.
- Check Archived and choose Restore to make an archived label available again.
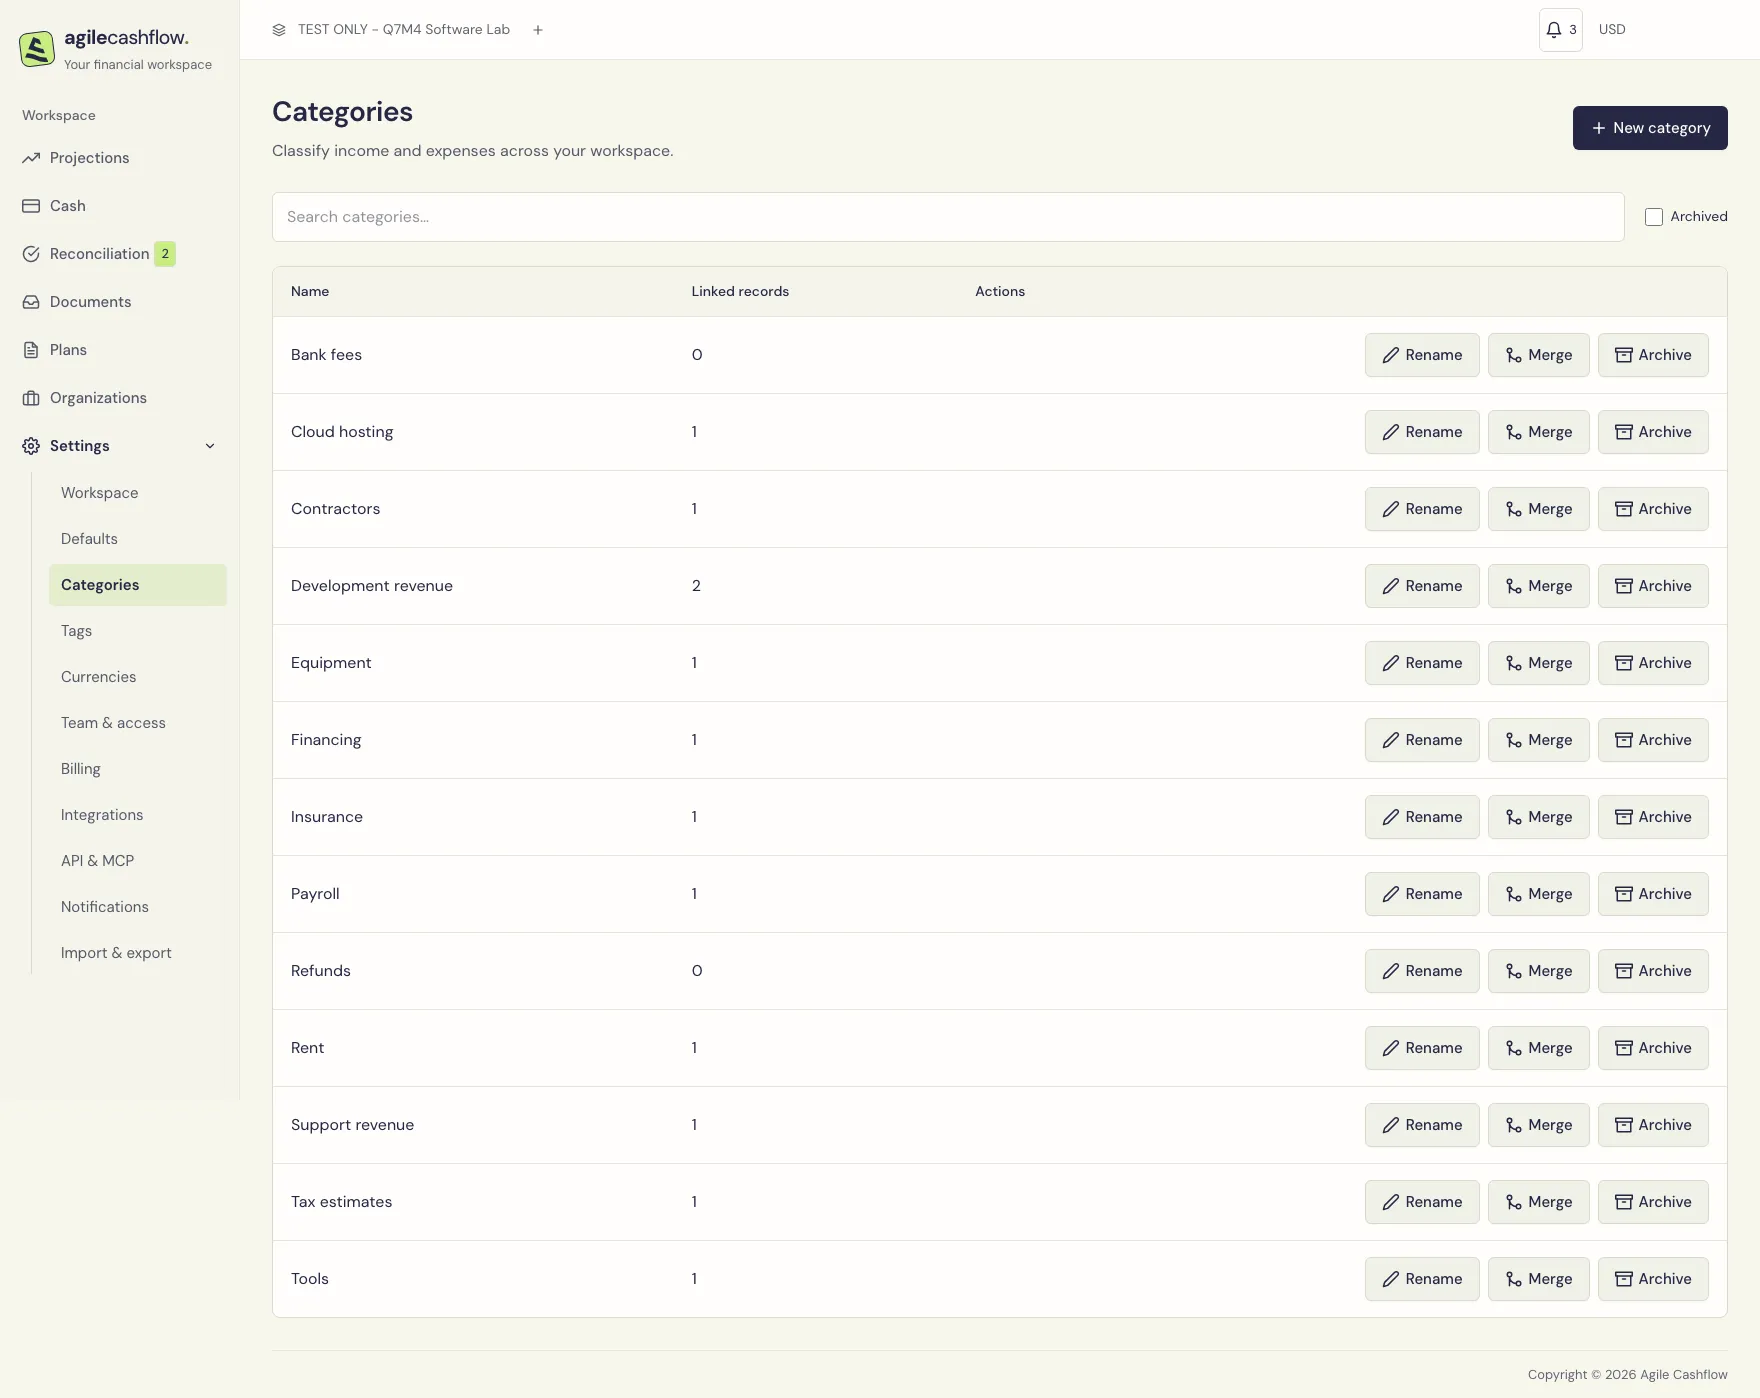
To consolidate duplicates, choose Merge on the source label, select the target under Merge into, and choose Merge category or Merge tag. Linked records move to the target and the source becomes archived. For example, merge Hosting costs into Cloud hosting. Restore alone does not move all those links back; review the target carefully before merging.
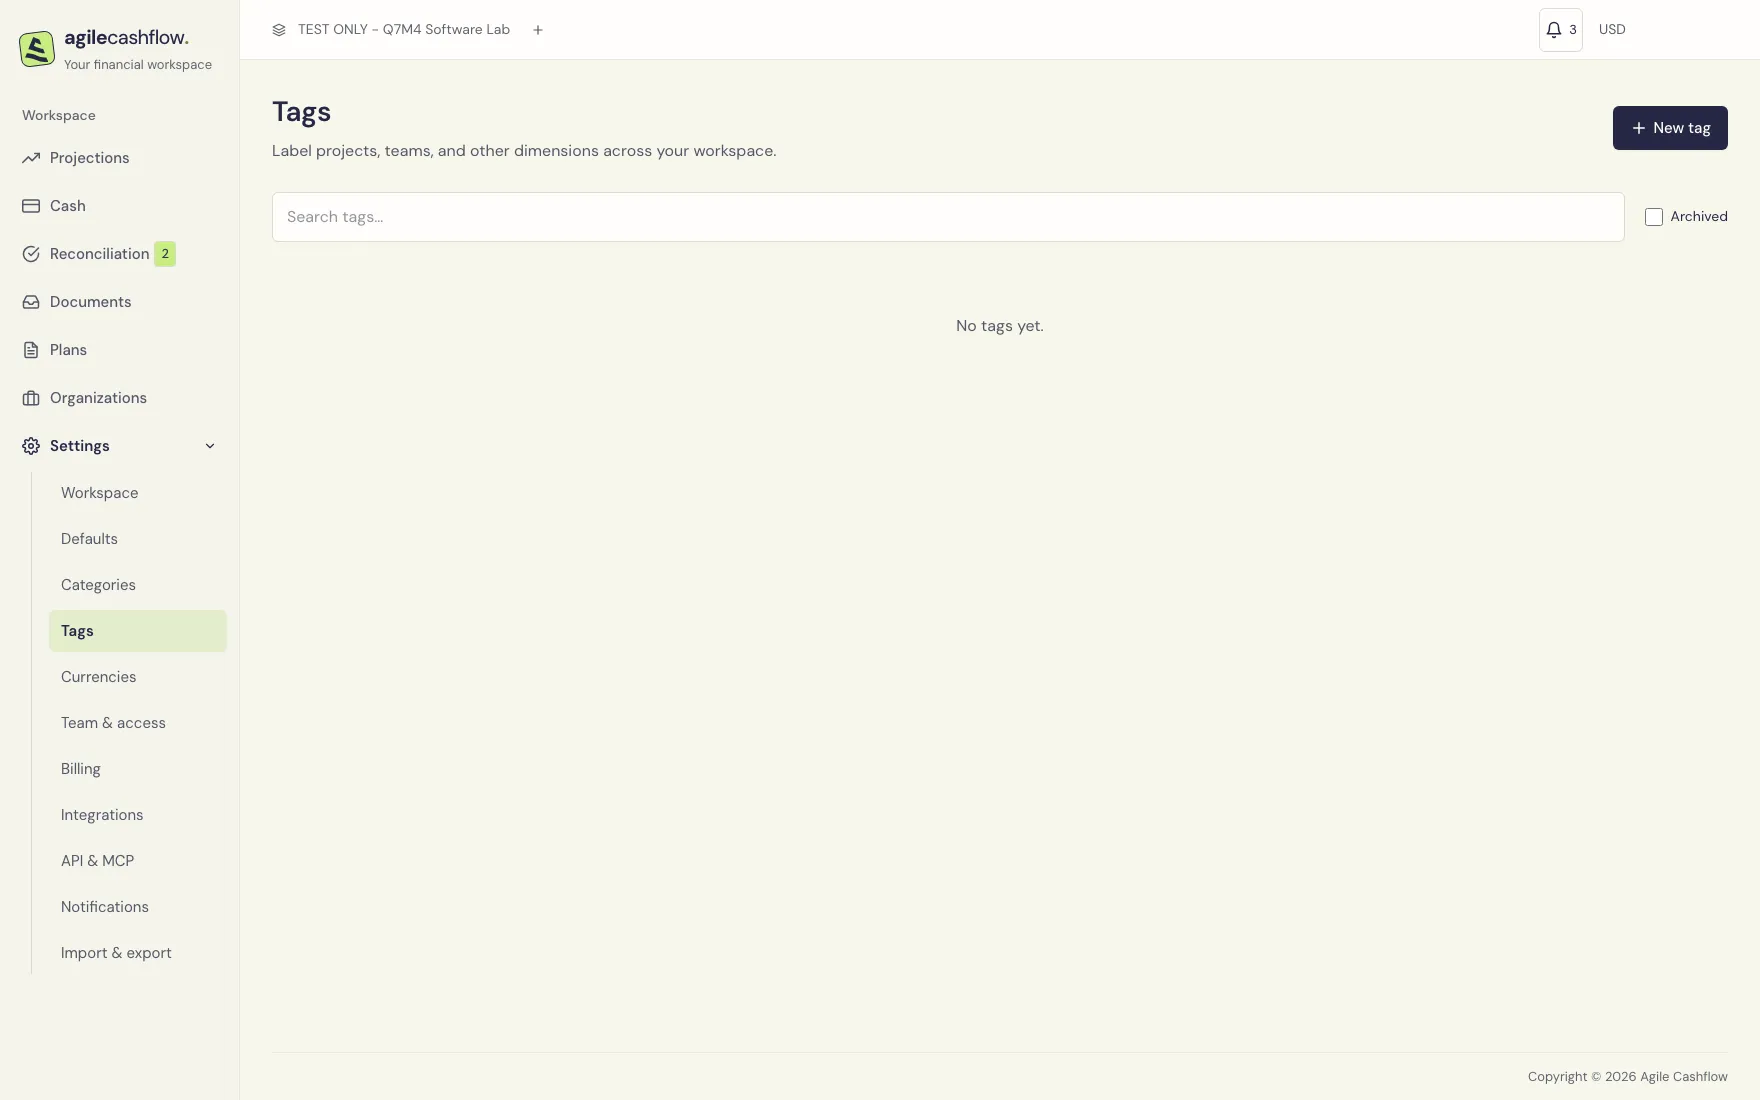
Tags on plans and scheduled amounts can support a manual hiring review, but they do not create an isolated forecast scenario. Changes to a live schedule affect the live workspace forecast.
Currencies and exchange rates
Enable or disable a currency
- Open Settings → Currencies → Enable currency.
- Choose its ISO currency code and Exchange-rate source: Manual or Automatic · ECB.
- Choose Enable currency.
- For manual currencies, add a dated rate before using them in records that need conversion.
The reporting currency always has a rate of 1 and is always enabled. A row’s Rate source changes how future conversions obtain their rate. Disable stops new use where permitted; it does not delete existing booked records. The default document currency cannot be disabled until you choose a different default.
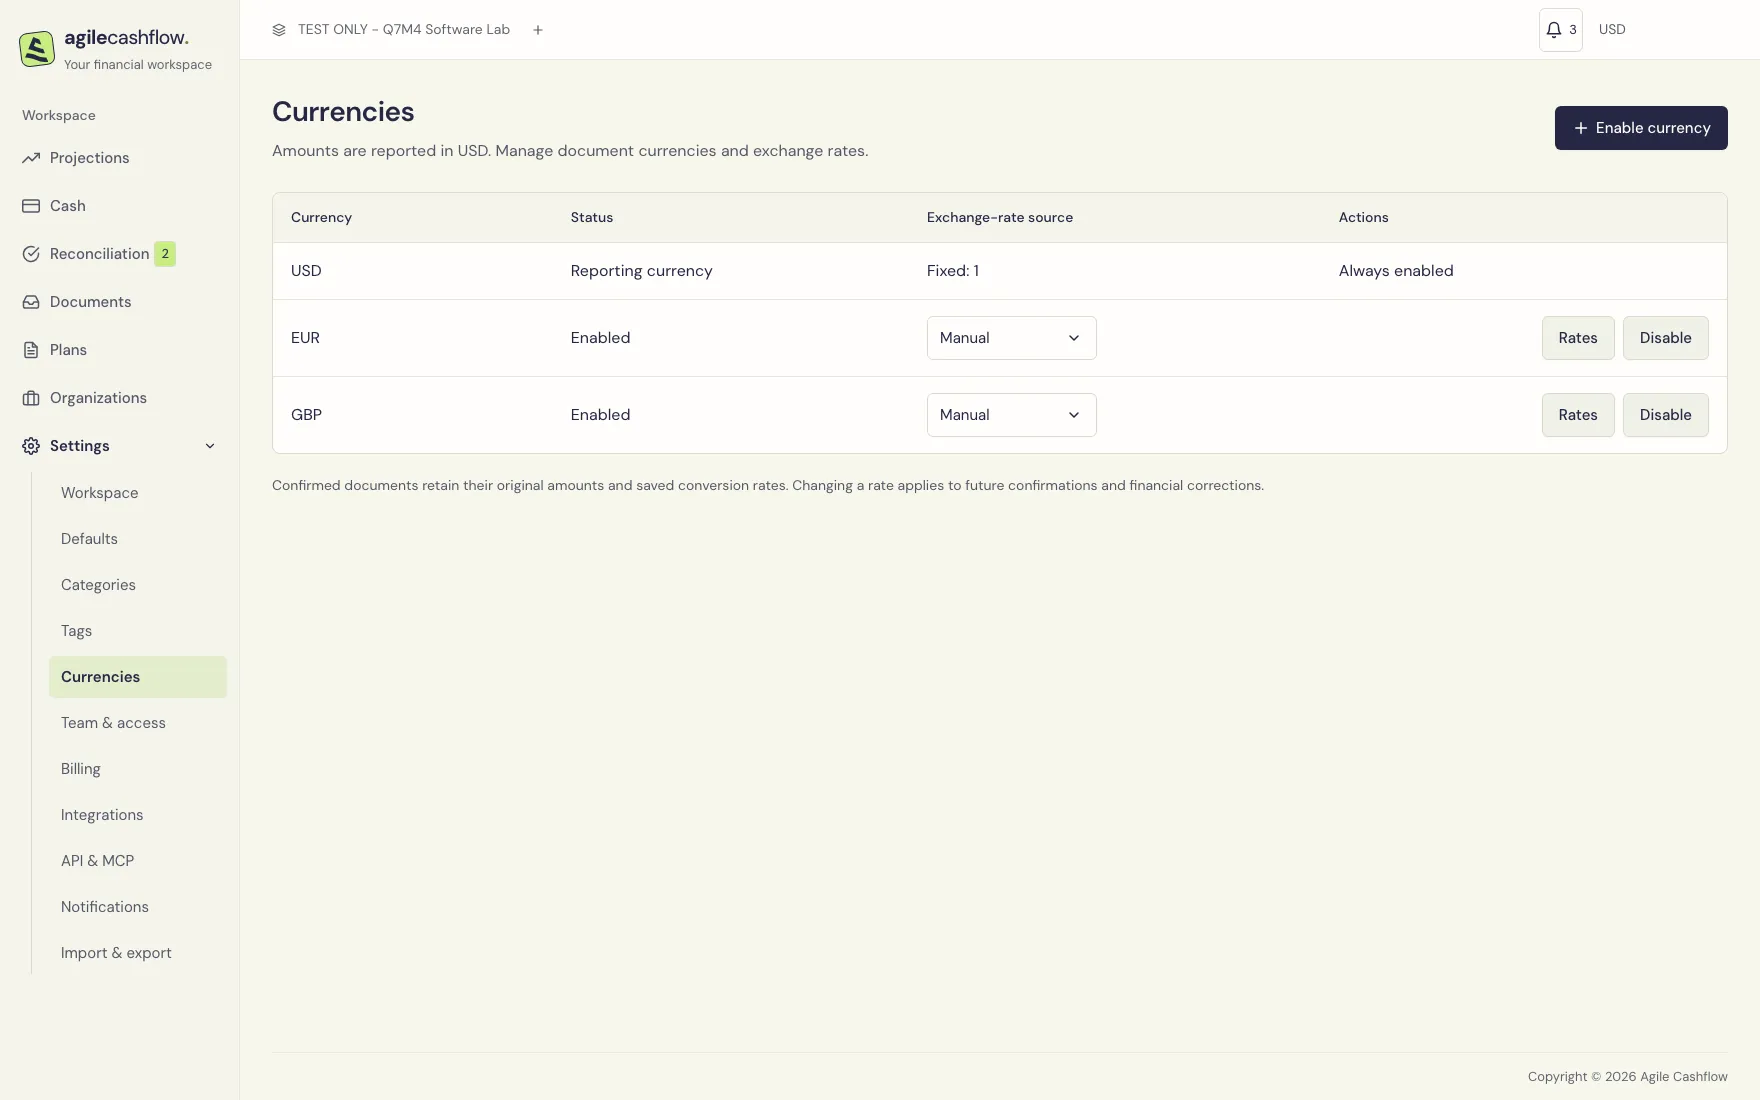
Enter, update, or remove a manual rate
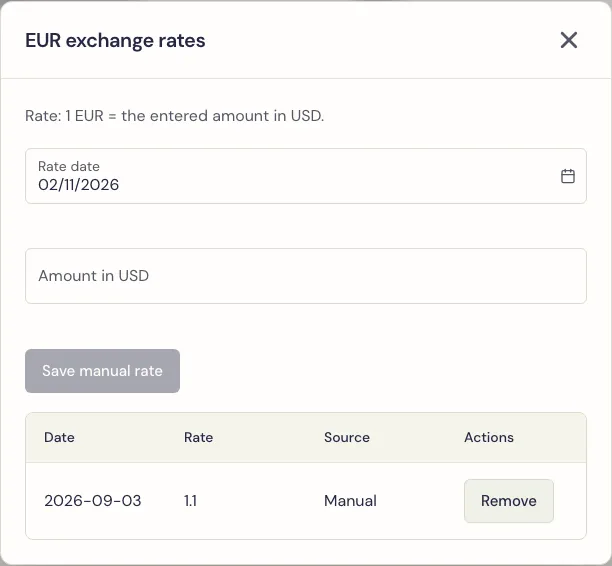
- Choose Rates on the currency row.
- Enter Rate date and Amount in USD (or your reporting currency).
- Interpret the quote as 1 source-currency unit = entered reporting-currency amount. For EUR/USD, enter
1.10to mean 1 EUR = 1.10 USD, not the inverse. - Choose Save manual rate. If a manual rate already exists for that date, the action is Update manual rate.
- Check the saved message and the rate table. Use the row’s Remove action and confirmation to remove an eligible manual rate.
Manual-source rates remain effective until replaced by a later applicable rate. Automatic rates use dated ECB reference data through Frankfurter; provider rows are read-only. An exact-date manual override takes priority for its date. If a quote is unavailable, supply/check the correct dated manual rate instead of guessing a conversion.
Confirmed documents retain their saved conversions when rates change. Cash retains its booking conversion, and foreign schedules retain imported quote values. A permitted financial correction can require a fresh rate check. Editing configuration alone is not a retrospective revaluation of all historical money.
Defaults
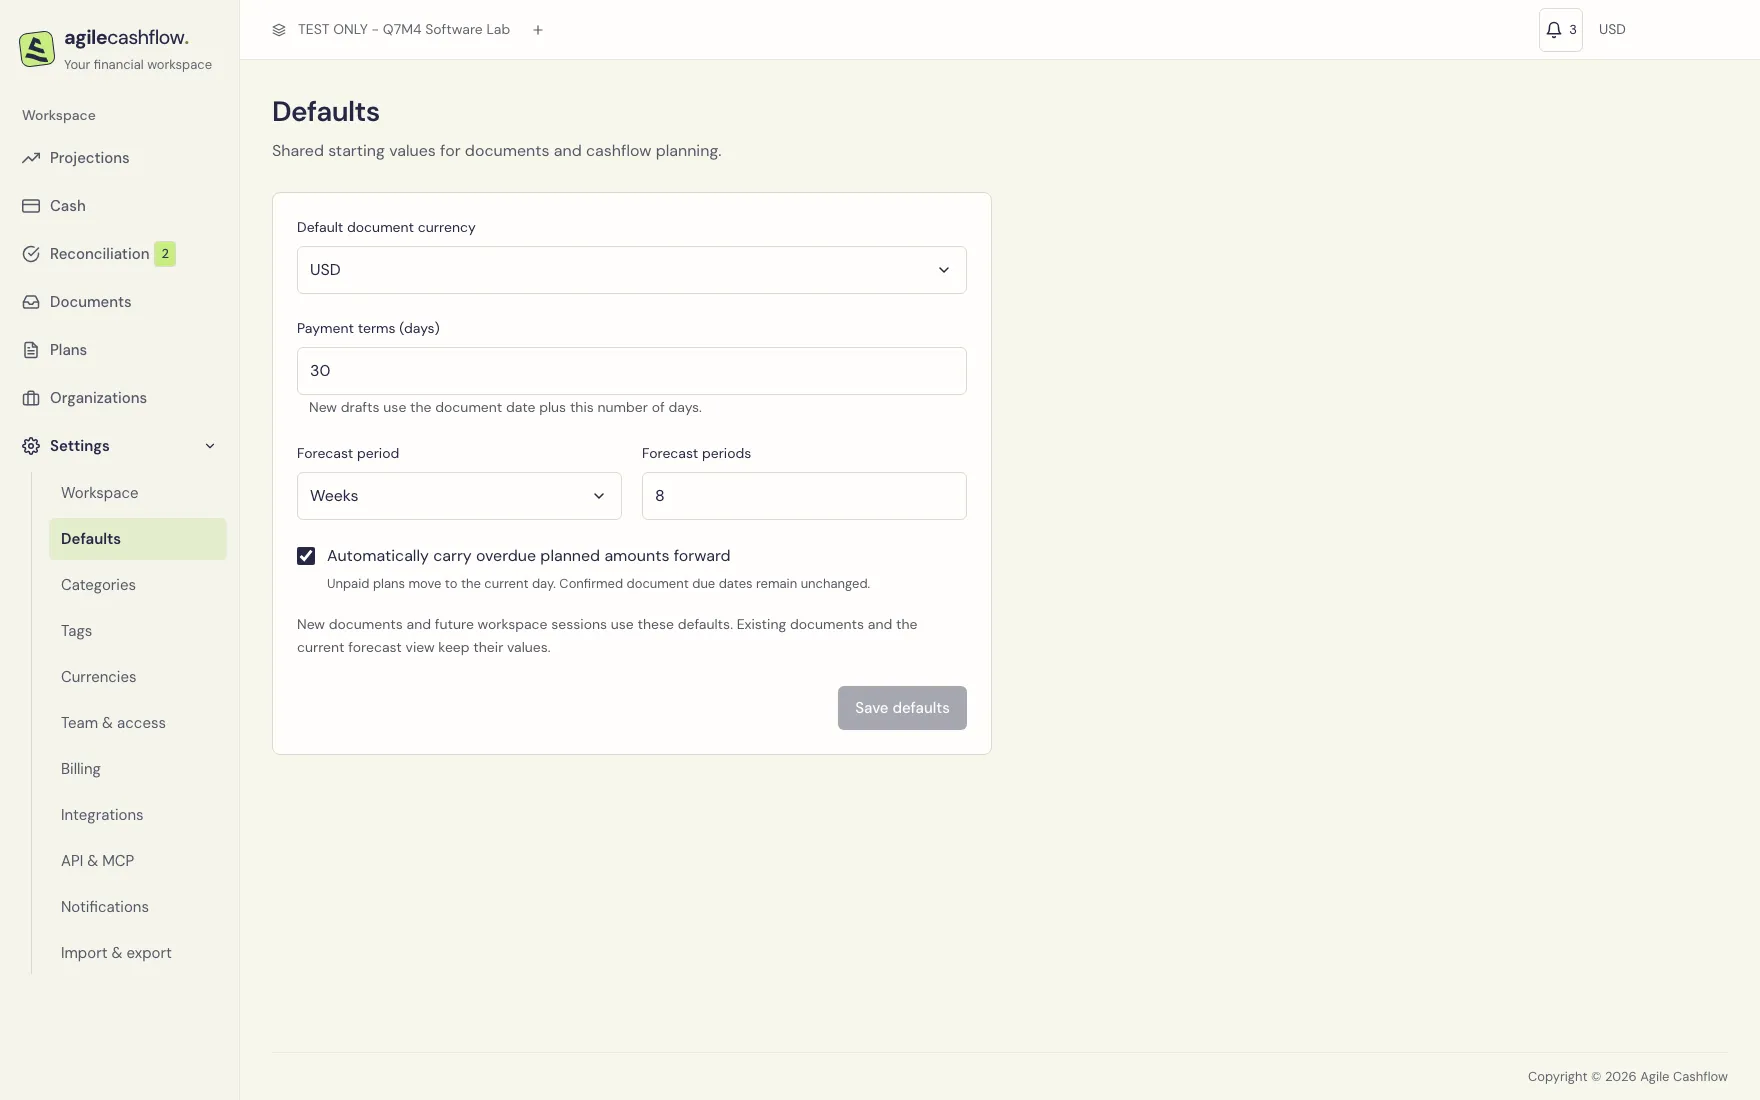
Open Settings → Defaults, change the values below, then choose Save defaults. Check the saved message.
| Setting | Meaning and limits |
|---|---|
| Default document currency | Starting currency for new drafts; choose an enabled currency |
| Payment terms (days) | Default due date is document date plus 0–365 days |
| Forecast period | Initial Days, Weeks, or Months view |
| Forecast periods | Initial horizon, 1–60 periods |
| Automatically carry overdue planned amounts forward | Controls automatic handling of overdue unpaid planned amounts |
These defaults apply to new documents and future workspace sessions. Existing document due dates and the currently selected forecast view retain their values. Automatic plan carry-forward does not rewrite the original due date on a confirmed invoice or bill.
Team and access
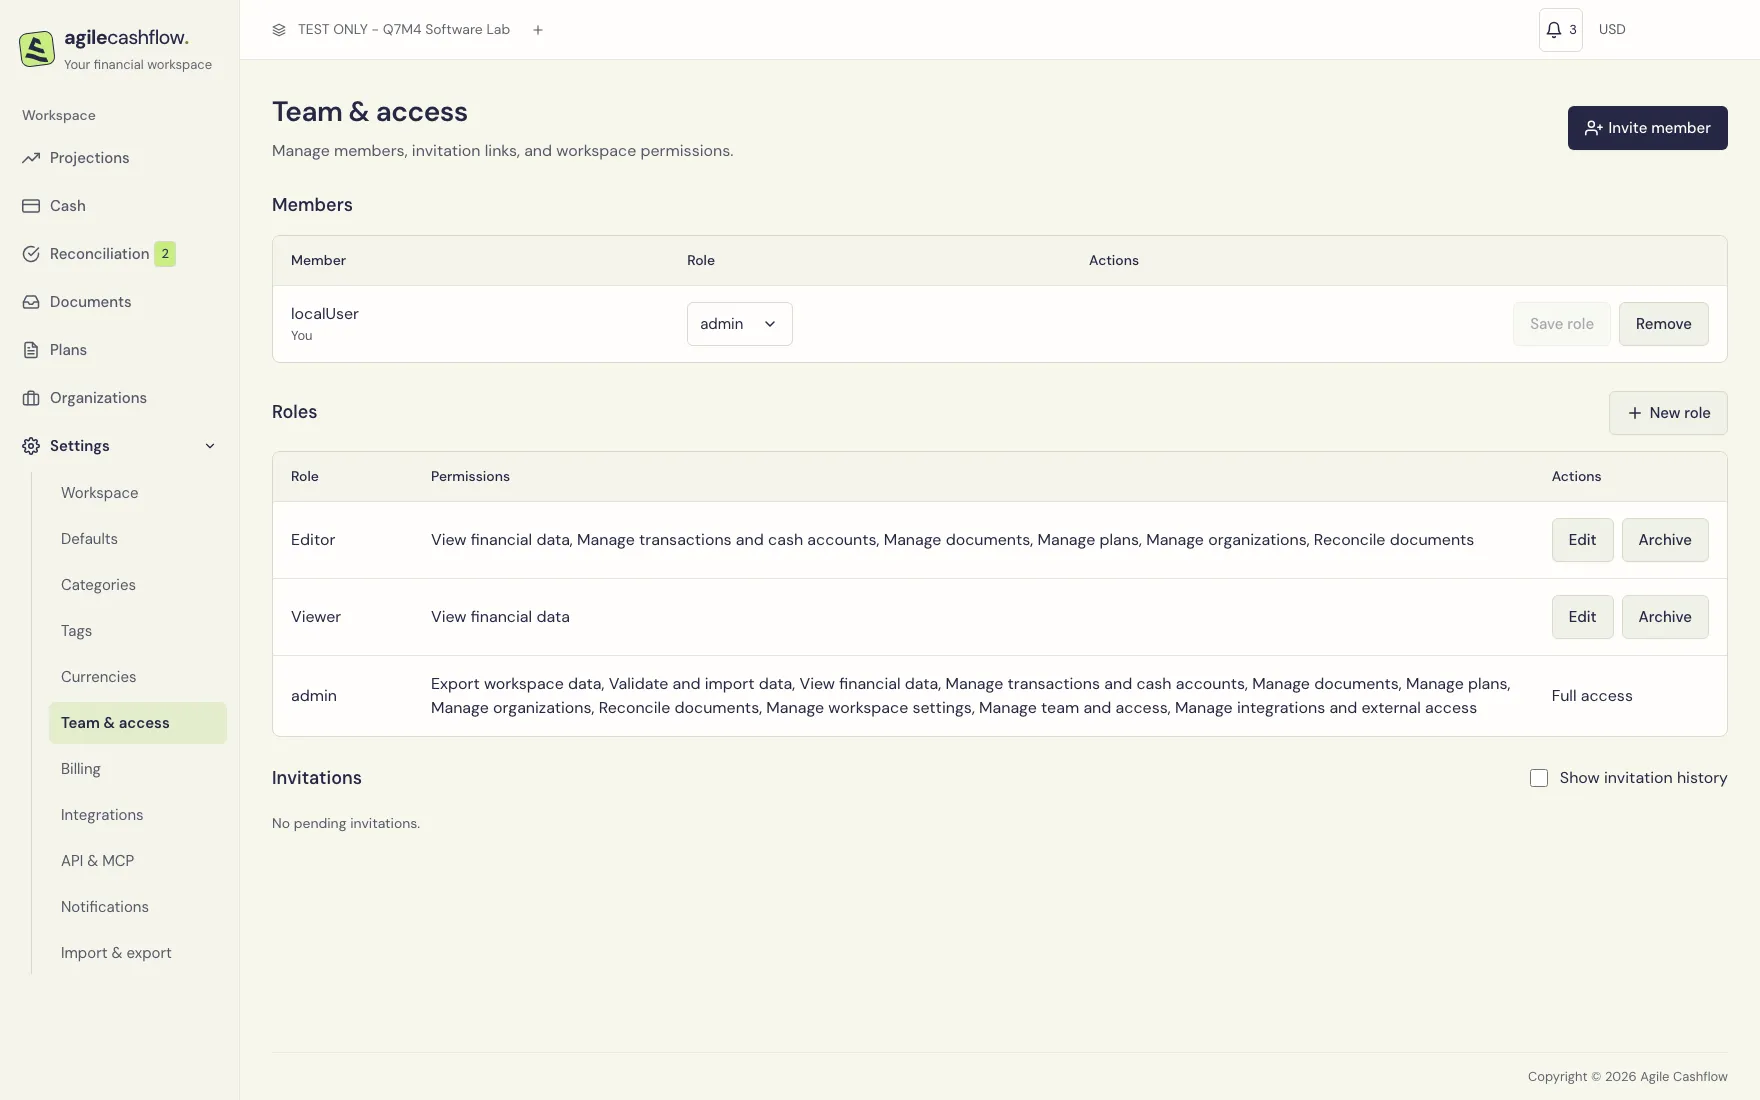
Open Settings → Team & access to manage members, roles, and invitations.
| Built-in role | Intended access |
|---|---|
| Viewer | Read financial data; no financial edits |
| Editor | Work with financial records and reconciliation; administrative permissions remain separate |
| Admin | Full workspace access, including settings, team, imports, and exports |
Inspect the displayed permissions rather than assuming a role’s name grants a particular custom capability. Export/import access and permission to edit a dataset are distinct. For example, importing cash requires Validate and import data plus Manage transactions and cash accounts.
Invite a member
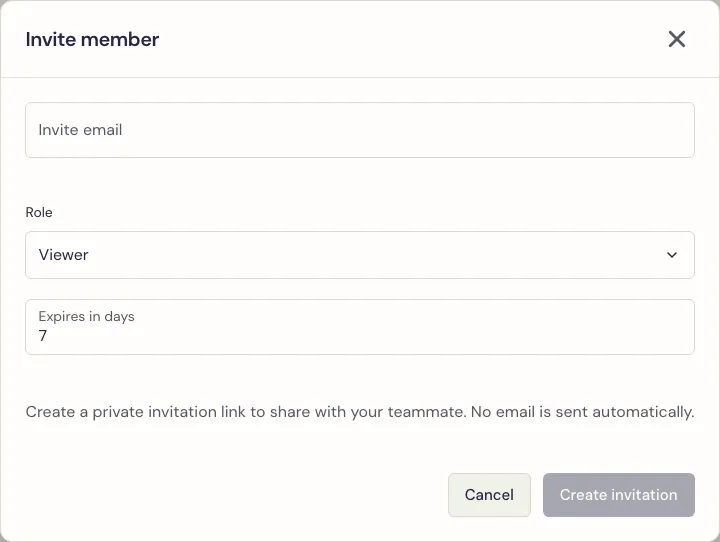
- Choose Invite member.
- Enter Invite email, select Invitation role, and choose Expires in days (1–30).
- Choose Create invitation.
- Use Copy link or copy the Invitation link field, share it privately with that teammate, and choose Done. No email is sent automatically.
- The teammate opens the link, signs in with that verified email, and chooses Join workspace. The workspace is selected after joining.
Pending invitations appear in the table. Revoke invalidates an unused invitation after confirmation. Show invitation history also shows accepted, expired, and revoked invitations. Create a new link when one expires.
Change a role or remove a member
Select the member’s role in the Members table, choose Save role, and confirm the change. Changing your own role affects your own access. To remove someone, choose Remove and confirm. The workspace must retain at least one active Admin.
Choose New role to create a custom role. Enter a role name, select its permission checkboxes, and Save role. Use Edit to change an existing eligible role. Before Archive on a role, reassign its members and revoke pending invitations using it. The Admin role itself remains full access.
Custom permissions cover viewing financial data; managing transactions/cash accounts, documents, plans, and organizations; reconciliation; settings; team; importing; and exporting. A role with only transfer privileges sees only datasets its other permissions permit.
API keys and MCP connections
Open Settings → API & MCP to connect scripts or an MCP client. Members can manage their own credentials even without permission to edit workspace settings. Team managers can also view credential metadata and revoke other members’ access.
Create an API key
- Choose Create API key and enter a name that identifies the script or service.
- Choose its expiry and permissions. Read-only financial access and 90 days are the defaults; additional permissions depend on your current role.
- Choose Generate key, copy the secret, and save it securely. It is shown once and disappears when you leave or reload the page, or after five minutes.
- Send the key in an
Authorization: Bearer YOUR_API_KEYrequest header. Use the Workspace ID shown on this page for workspace API requests.
The key works only in this workspace, with the intersection of its selected permissions and your current role. Keys cannot manage team access, create more keys, link integrations, or run background imports/exports. To rotate a key, create a replacement, update the script, then Revoke the old key. Revocation is immediate. The list shows expiry, status and last use without revealing secrets.
Connect an MCP client
- Copy Server URL into your MCP client and choose OAuth authentication.
- Follow the client’s browser prompt and sign in to Agile Cashflow.
- Review the application name, client identifier and return address. Choose the workspace you want it to access, then choose Allow access or Deny.
- Return to your MCP client. It can read organizations, invoices, bills, cash, plans and cash-flow projections. MCP tools are read-only.
The client must support Client ID Metadata Documents or have a configured OAuth client registration. Your administrator can enable dynamic registration for clients that require it. Each connection grants access to one workspace; connect again and select another workspace to authorize it separately.
Use Connected apps → Disconnect to revoke an application’s connection and tokens. Losing workspace permissions reduces access immediately. Removing a member permanently revokes their keys and connections; rejoining requires new credentials.
Notifications
In Settings → Notifications, configure Upcoming payments, Remind before due date (days) (1–90), and Overdue receivables, then Save changes. Preferences apply to everyone in the workspace, while read status is personal. The sync-failure toggle applies to connected integrations.
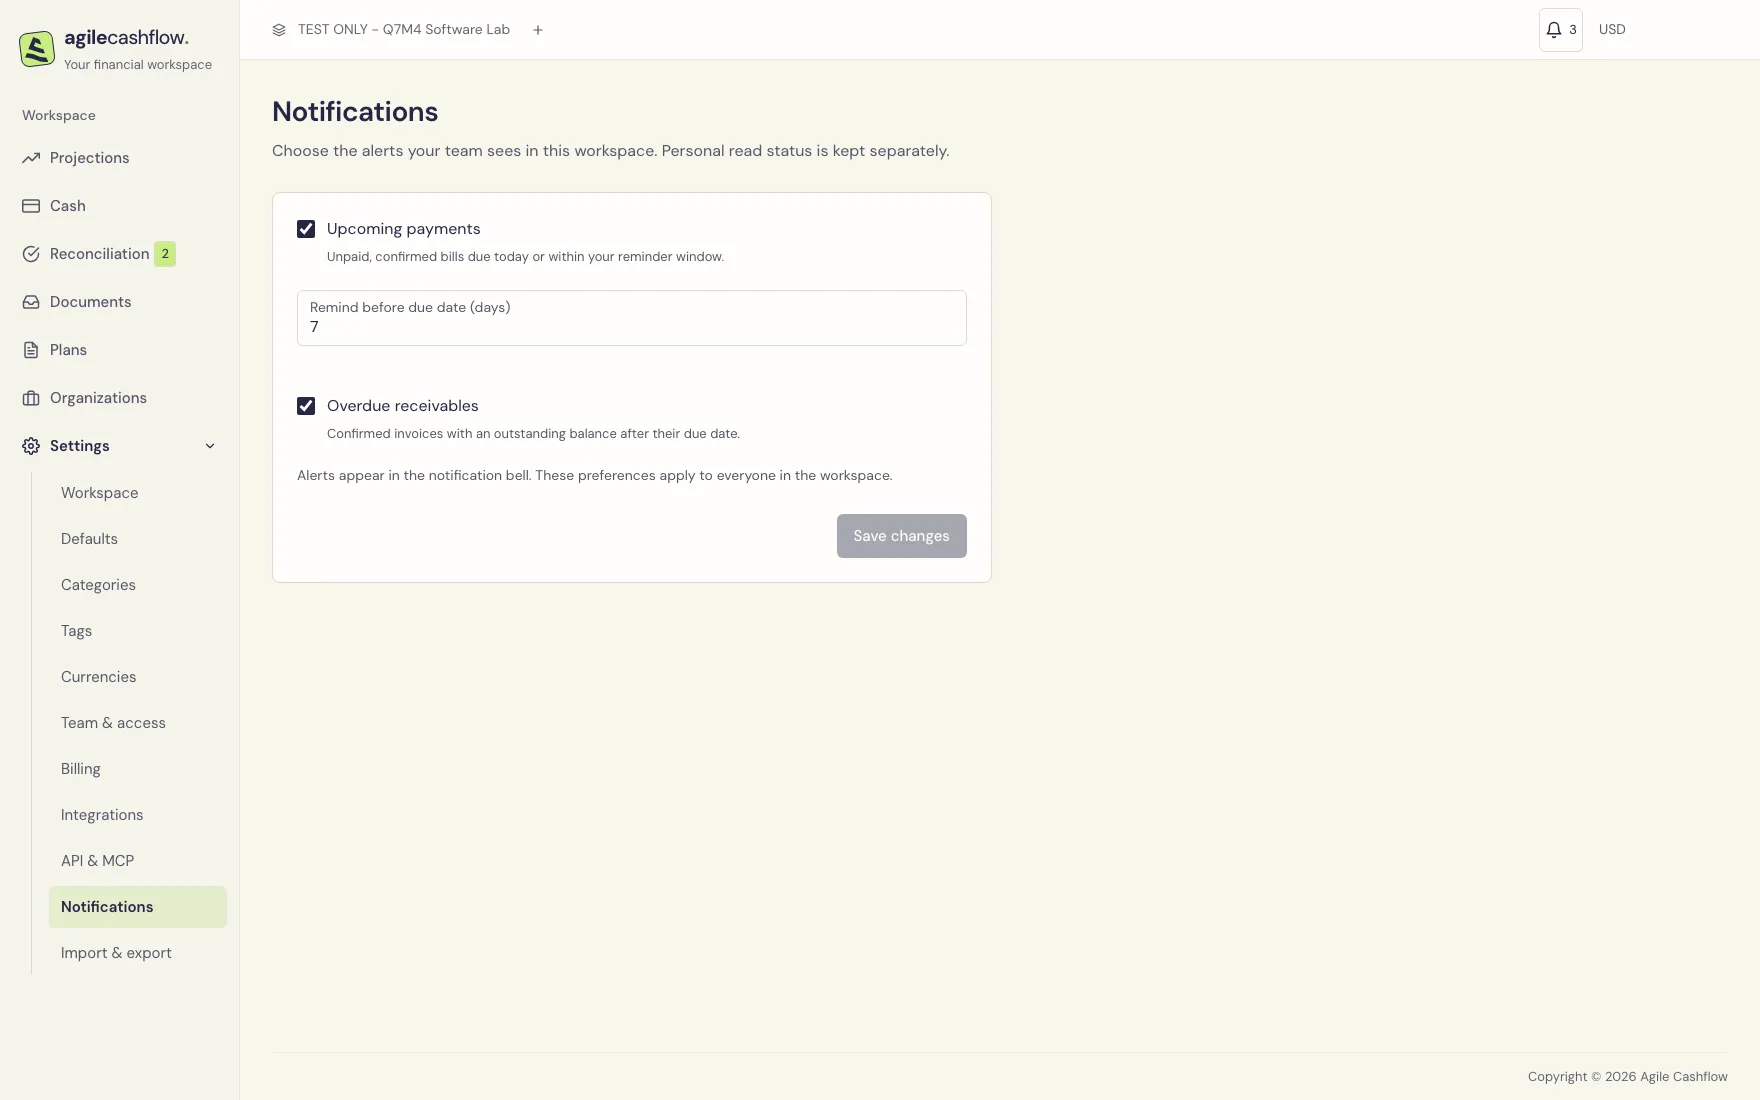
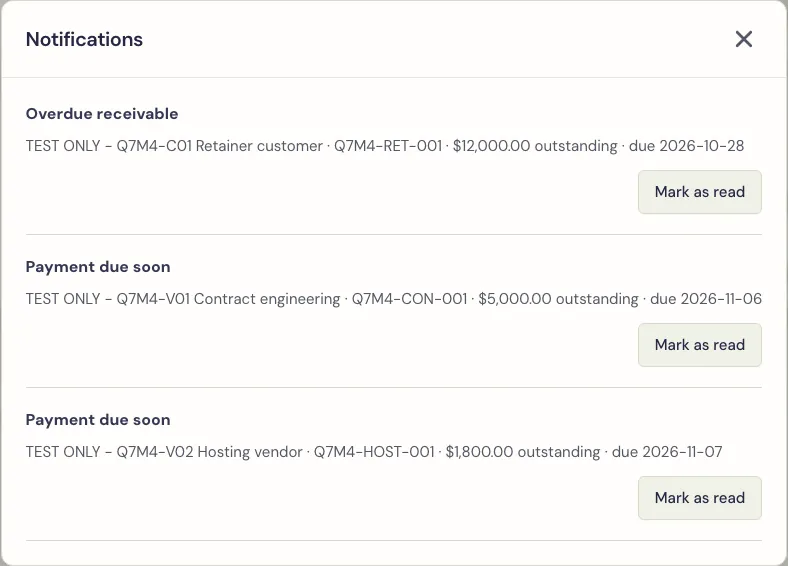
Open the top-bar Notifications bell to review current alerts. Select an alert to open its source record. Choose Mark as read to remove its unread state for you. Marking it read does not settle the balance or clear it for other people.
Upcoming-payment alerts use unpaid confirmed bills due today or within the window. Overdue-receivable alerts use unpaid confirmed invoices after their due dates. Paid amounts are subtracted; drafts and plans are excluded. For example, a $3,000 payment allocated to an $8,000 bill leaves a $5,000 alert balance. A plan match alone does not pay it.